Fishing Knot Tying Tools: What Each Type Does
Dockrig is reader-supported. When you buy through links on this page, we may earn a commission.
Knot tools do 4 jobs: holding tension, forming turns, threading small eyes and cutting line.
Each type lines up with certain knots, and each has a few specs to check on the package.
None of these tools are required. Every knot on Dockrig can be tied by hand. Tools help with 3 problems: tension on braid, small hook eyes and clean cuts.
Tool types at a glance
| Tool type | What it does | Knots it helps with | Line | Hand-tie instead? |
|---|---|---|---|---|
| FG knot bobbin | holds braid under tension while you wrap | FG knot | braid to leader | yes, with practice |
| Handheld knot tyer | holds the line and hook while you form turns | clinch, nail knot types | mono, fluoro | yes |
| Hook tying tool | grips a small hook and guides the wraps | snell, small-hook knots | mono, fluoro | yes |
| Nail knot tool | a tube or slot to pass the tag under the wraps | nail knot | fly line, leader | yes |
| Split ring pliers with cutter | opens split rings, cuts line | none directly; trims tags | all, check braid rating | n/a |
| Line clipper | trims tags close | every knot that leaves a tag | mono, fluoro; braid if rated | n/a |
The first 4 rows help you tie. The last 2 help you finish. For most anglers, a sharp clipper does more for knot quality than any tying aid.
Tension: FG knot bobbins
The FG knot wraps braid around a leader 15 to 20 times. The braid must stay tight the whole time. Most failures come from slack wraps.
A bobbin holds the braid spool or a short length of braid. Its weight keeps tension while you swing it around the leader. Some anglers use a bobbin knotter made for braid. Others use a fly-tying bobbin.
Who it suits: anglers who tie the FG often, on a boat or at a bench. If you tie 1 FG a season, a double uni may be simpler.
The bobbin also helps with spacing. Each wrap lands where the last 1 left off. So 15 or 20 wraps come out even instead of bunched in clumps along the leader.
PE numbers on Japanese tackle describe braid size. They don't map neatly to lb test across brands. Check the bobbin's range against your braid's spool label.
Turns: handheld knot tyers
A handheld knot tyer holds the hook and line in place. You twist or pass the line around a post to form turns, then slide the knot off onto the eye.
It helps most with small hooks, cold hands and poor eyesight. An improved clinch on a #10 hook is fiddly by hand. A tyer holds things still.
The tradeoff is time. Once you learn a knot, tying by hand is usually faster. A clinch takes most practiced anglers well under a minute, and a tyer adds a step for loading the hook.
Turns: hook tying tools
Hook tying tools are small and simple. Many are a slotted tube or a grip. They guide the wraps for a snell or a small-hook knot.
The snell needs 7 even wraps along the shank. A tool keeps the wraps from crossing. It also holds the line along the shank while you wrap.
Who it suits: anglers snelling a batch of hooks at home. Catfish and panfish anglers often pre-tie 10 or 20 snells before a trip.
Nail knot tools
A nail knot tool is a tube or a slotted needle. You wrap the line around it, then pass the tag back through the tube under the wraps. Pull the tool out and tighten.
It's mostly a fly fishing tool. The nail knot joins a fly line to a leader, and the coated fly line is too thick and slick for most of the knots on this site to grip well. Freshwater spinning and baitcasting anglers rarely need it.
If you fish flies, a simple tube works, and so does an actual nail or a thin straw.
Cutting: split ring pliers with a cutter
Pliers do a lot on the water. Many fishing pliers have a split ring tip and a line cutter near the jaw, like these split ring pliers with serrated line cutters.
For knots, the cutter matters. Braid needs a sharp, tight-fitting blade. A cutter that crushes braid leaves a frayed tag. Look for cutters rated for braid.
The split ring tip is a bonus. You'll use it changing hooks on crankbaits and jerkbaits. A 3-hook jerkbait has 3 rings, and opening them with a fingernail gets old fast.
Cutting: line clippers
A clipper is the tool you'll use most. Every knot ends with a trim, so a day with 20 retied knots means 20 or more cuts.
Trim length matters. About 1/16 in. on mono and fluoro. About 1/8 in. on braid. A clipper with a flat, sharp edge makes that easy.
Some clippers, such as a line clipper with a retractor, clip to a vest or shirt, which keeps the clipper within reach and stops it from going over the side when you drop it in a hurry.
Some have a small needle for clearing hook eyes. Neither is essential. A sharp edge is.
Which tool for which knot
- FG knot: a bobbin for tension. A clipper for the trim.
- Double uni: hands only to tie. A clipper for the 2 tags.
- Palomar: hands only to tie. A clipper for the tag, rated for braid on braid.
- Improved clinch: a knot tyer helps on small hooks. A clipper for the tag.
- Snell: a hook tool keeps the 7 wraps even. A clipper for the tag.
- Arbor knot: hands only to tie. A clipper for the tag at the spool.
- Bobber stop knot: hands only to tie. A clipper to trim the tags to about 1/2 in.
Every knot that leaves a tag ends with a clipper. The dropper loop is the 1 knot here with no tag to trim. It's tied in the middle of the line, and a pencil to hold the loop in step 3 is all it needs.
On braid, the cutter is the tool that matters most. See knots for braided line for the trim rules.
Where tools help on the water
- Cold mornings in early spring: stiff fingers make small knots hard. A knot tyer or hemostats help on 4 to 6 lb line.
- Night fishing for catfish: pre-tied snells save time. Tie 10 at home with a hook tool.
- Boat fishing with braid: a braid-rated cutter on a lanyard. You'll trim 20 or more tags a day.
- Bank fishing for panfish: a clipper and nothing else. Small hooks, light line, quick retie.
Tying by hand vs with a tool
Most of the knots on Dockrig take 4 to 7 steps. With 20 or 30 practice ties at home, hands are fast enough for all of them.
Tools earn their place in 3 cases.
- Tension you can't hold. The FG needs the braid tight for 15 to 20 wraps. That's hard with 2 hands and a rod in your lap.
- Eyes you can't see. A #10 or #12 hook eye is tiny, and harder to see in low light. A tyer or hook tool holds it still.
- Cuts you can't make clean. Teeth and dull nail clippers don't cut braid. A sharp blade does.
If none of those apply, skip the tying aids. Buy a good clipper and practice.
Practicing knots at home
A tool can't replace practice. Nothing does. The cheapest training aid is 2 colors of line and a hook with the point cut off.
Tie each knot 10 times at a table. Use 20 lb mono at first, since thicker line shows the turns clearly. Then drop to the line you fish, 8 or 10 lb.
For line-to-line knots, use 2 colors. You'll see which turns belong to which side of a double uni. For the FG, practice with a bobbin and without. That tells you if the bobbin is worth carrying.
Count turns out loud. 5, 6 or 7 matters, and it's easy to lose track.
Time yourself once you're comfortable. If a knot takes more than 2 minutes, a tool may help. If it takes 30 seconds, you probably don't need 1.
Building a small knot kit
You don't need all 5 types. Here's what we'd carry for a few common setups.
- Bank angler, panfish and catfish: a clipper and a hook tool for pre-tied snells. 2 items.
- Bass angler on braid: braid-rated pliers with a cutter, and a clipper on a lanyard. Add a bobbin if you tie the FG at home.
- Trout angler on light mono: a clipper with a small needle for clearing eyes. A knot tyer if small hooks are a struggle.
- Fly angler: a clipper and a nail knot tube.
Keep the kit in 1 small pouch. The tool you can't find doesn't help.
Care and storage
Rinse pliers and clippers in fresh water after a trip. Dry them before they go back in the box. A drop of light oil on the pivot keeps them opening smoothly.
Blades dull over time, faster on braid. If a clipper starts crushing 10 lb braid instead of cutting it, replace it or the blade.
Store bobbins with the braid wound on loosely. Tight braid on a small spool can dig in and tangle.
Common mistakes with knot tools
- Cutting braid with mono clippers. The tag frays and the knot looks unfinished.
- Trimming flush. Leave about 1/16 in. on mono and 1/8 in. on braid.
- Leaning on a tyer instead of learning the knot. Know the hand version for the day the tool is lost.
- Wet tools in a closed box. Plain steel can start to rust.
- The wrong hook range. Check the size range before you rely on a tool.
What to check on the label
Package claims are worth a second look.
- "Ties any knot." No tool ties every knot. Check the list of knots it's designed for.
- "Cuts braid." Check the braid range. Some cutters handle 10 lb braid and struggle with 50 lb.
- Hook size range. A tool for #2 to #10 hooks won't help with 5/0 catfish hooks.
- Materials. Stainless or coated parts resist rust. Plain steel can rust if put away wet.
- PE or lb ratings. These vary by maker. Compare with your line's own label.
How to pick
- Do you tie the FG? Then a bobbin is worth a look.
- Do you struggle with small hooks? A knot tyer or hook tool.
- Do you use braid? A braid-rated cutter or clipper.
- Do you change trebles? Split ring pliers.
- Everyone: a sharp clipper.
Gear for this page
 Shimano TH-202N Bobbin Knotter Knot Machine Heavy P.E 1.5 - 8 Black 413352A bobbin knotter for the FG knot.
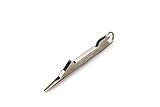 TIE-FAST Fishing Line Knot Tyer, SilverA tube tyer for nail knots and the improved clinch on small hooks.
 FREGITO Fishing Line Hook Knot Tying Tool, Copper, 1pcsA hook tyer for the snell knot.
 Bubba Split Ring Pliers with Micro Serrated Line Cutters, Precise Tip, StainlessSplit ring pliers for lures tied with a non-slip loop.
 Booms Fishing FC2 Fishing Knot Tools Fishing Line Clipper with RetractorA clipper for tags after any knot on the knots page.
Read next
- Fishing knots by connectionevery knot on Dockrig by job
- Knots for braided linetrim and turn rules for braid
- Bobber stop knottags and depth
- Dropper loopno special tool needed
- Swivels and snapshardware that goes with these knots
- Gear we referenceevery product on Dockrig, with the knots and rigs it fits
Sources: knot steps and turn counts from the linked knot pages. Product details from the maker's listing in each box. Method on our methodology page..